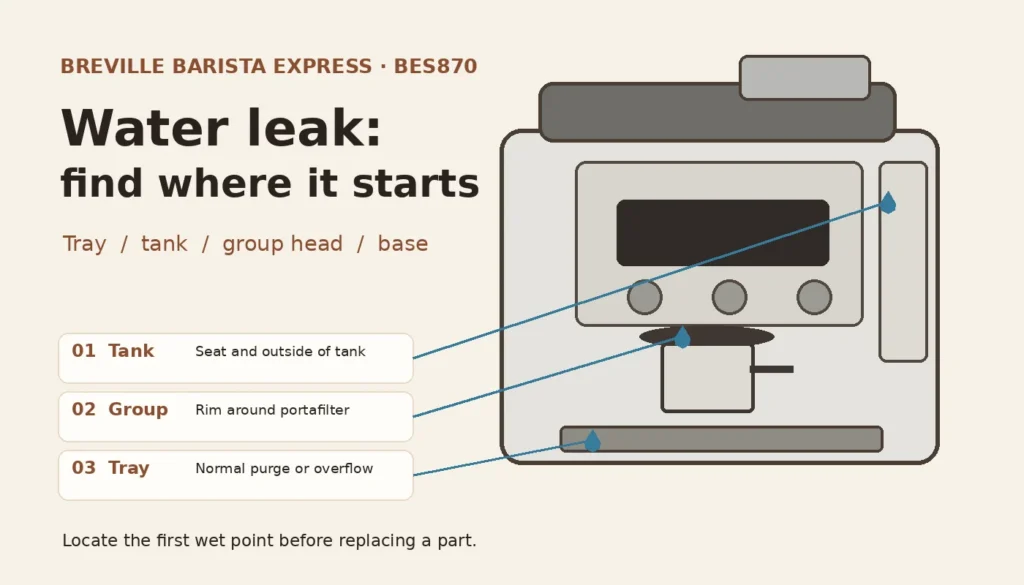
Quick answer: On a Breville Barista Express BES870, water in the drip tray immediately after brewing or steaming may be the normal auto-purge described in the manual. Water on the counter is different. First empty and fully seat the tray, push the water tank down into place, and note where the water first appears. A leak around the portafilter during a shot points toward the group-head seal or the way the portafilter is seated. If water emerges from beneath the housing, stop using the machine and unplug it when you can do so safely. Do not open a wet appliance to hunt for the source.
This guide is for the Barista Express BES870 model family, including the common US BES870XL designation. Check the rating label and the manual for your market and revision before ordering a seal or following a disassembly step. The checks below follow Breville’s current US/Canada/Mexico instruction book, especially “Water leaking” in Troubleshooting and “Using the Allen Key” in Care & Cleaning. The location tests are editorial diagnostic checks, not manufacturer-confirmed fault rates.
First, identify the leak
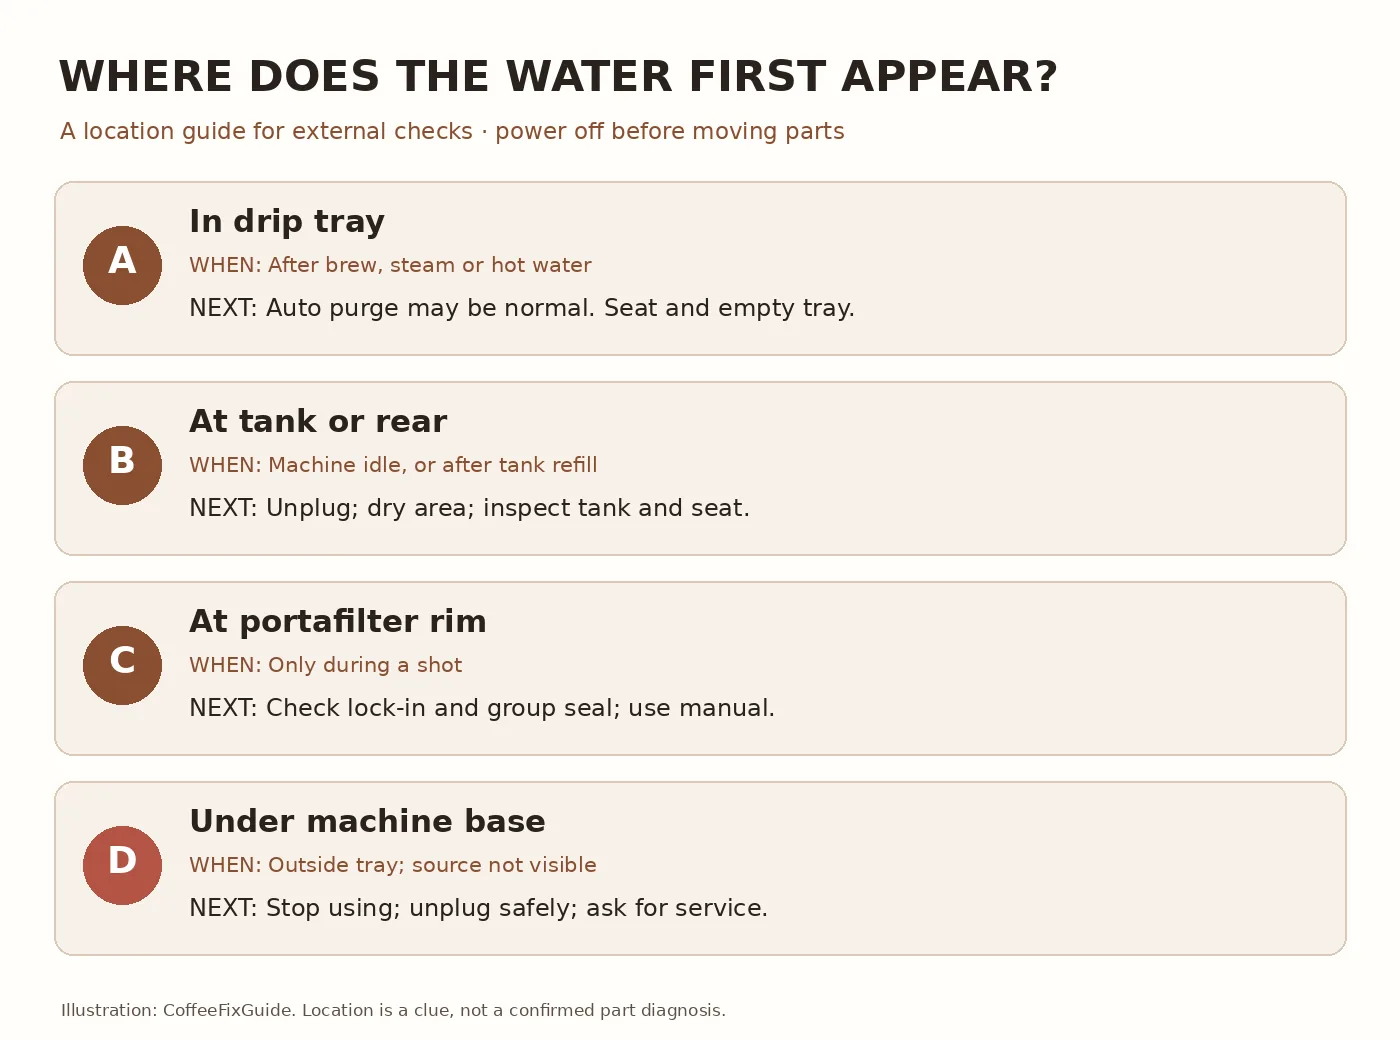
| First wet point | When it appears | Best next check |
|---|---|---|
| Inside the drip tray | Shortly after a shot, steam or hot water | Empty the tray and seat it fully. Some auto-purge water is expected. |
| At the water tank or rear | At rest or soon after a refill | Power off, dry the area, inspect the removable tank, then reseat it firmly. |
| At the portafilter rim | Only while extracting espresso | Check that the portafilter is properly secured; inspect the group-head seal when cool. |
| Under the base, away from the tray | At rest or during use, with no clear external source | Stop, disconnect power safely and contact qualified service. |
Safety: Water near the plug, cable, controls or underside of the housing is a stop point. Do not reach through water to unplug the machine. Isolate power safely first. Let hot parts cool before handling the tray, tank or group head. Never run the machine with its casing removed.
Tools for the external checks
- Clean dry cloth or paper towels and a flashlight to find the first wet point.
- A container for emptying the drip tray.
- Your exact BES870 instruction manual. If a new group-head seal is actually needed, Breville’s procedure uses the supplied Allen key; its manual also mentions a skewer to clear coffee from the shower-screen screw and long-nose pliers as an option for removing the old seal.
Check 1: separate tray water from a leak onto the counter
- Turn the machine off. Allow the machine and tray to cool; remove and empty the tray without spilling it onto the counter.
- Dry the tray exterior and the counter. Slide the tray all the way back into place.
- On the next normal use, observe from outside the machine. Water collected inside the tray after an espresso, hot-water or steam function can be normal auto-purge. Breville specifically lists this under “Water leaking.”
- If the tray quickly overflows, check whether it was full, tilted or not seated. If water appears outside a correctly fitted, empty tray, move to the tank and base checks below.
An “Empty Me!” indicator means the tray needs emptying. It does not identify an internal pump or valve failure. Repeated water on the countertop should not be dismissed as auto-purge.
Check 2: inspect and reseat the water tank
- Switch off, unplug and dry the area before handling the tank. If the outlet itself is wet, isolate power safely and wait for service.
- Remove the tank and examine its outer walls, bottom and accessible seating area for visible damage or trapped debris. Do not press or alter a tank valve with a tool.
- Refill to a sensible level below MAX, then push the tank down completely until it sits in its normal position. Breville explicitly lists an incompletely seated tank as a cause to check.
- Recheck the dry counter before operating. If the removed tank itself leaks while standing upright on a dry surface, the tank needs manufacturer-compatible replacement. If the tank stays dry but water collects at the machine’s rear, the tank alone is not proven faulty; seek support rather than opening the housing.
If the machine also has no water from the group head, follow that separate flow diagnostic. A puddle and a no-flow symptom may occur together, but neither proves which part is defective.
Check 3: water escaping around the portafilter
Only during extraction? Stop the shot. When the metal has cooled, remove the portafilter, clean loose grounds from its rim and the accessible group-head sealing surface, then lock it in according to the manual. Breville says the portafilter must be firmly secured before operation. If water still escapes around a correctly secured portafilter, inspect the silicone seal surrounding the shower screen. The manual lists this seal under “Water leaking” and gives a replacement procedure under “Using the Allen Key.” A visibly worn or damaged seal is a reason to obtain the correct replacement; it is not a reason to guess a part number from a different Breville model.
If you replace the seal: use the instructions and diagram for your exact manual. Breville’s US/Canada/Mexico BES870 book says to power off and unplug, remove the tank and tray, clear the screw head, then use the supplied Allen key to remove the screw and shower screen. Remember the screen orientation; clean and dry it. Remove the old seal, fit the new one flat side first, ribbed side facing you, reattach the screen and tighten the screw only as directed without overtightening. Refit the tray and tank before normal testing. If the screw is damaged, the seal will not seat, or the group head appears cracked, stop and use service. The procedure is limited to the user-accessible assembly described in the manual; do not remove the machine housing.
Check 4: water emerging from under the housing
Drying the counter helps identify whether the water came from an overfilled tray or loose tank, but the underside itself is not an owner repair target. If the external tray and tank checks do not explain the water, keep the machine off and arrange Breville support or qualified repair. A hidden hose, connection or internal component is only a possibility until a technician inspects it. Do not repeatedly brew to reproduce a leak near electrics. For an older machine, a written estimate can go into the repair-versus-replace calculator; it cannot tell you which component is broken.
Likely next actions and parts
| Observation | Diagnostic priority | Part or action |
|---|---|---|
| Water stays inside a seated tray after a cycle | First check: normal auto-purge | Empty and reseat tray; no replacement based on this alone. |
| Tank visibly leaks when removed and upright | Likely external source | Find a water tank matched to the exact model and region. |
| Shot leaks at portafilter rim after reseating and cleaning | Possible group-head seal wear | Inspect the seal; confirm the correct Breville silicone seal before ordering. |
| Water appears beneath housing after external checks | Service-only until diagnosed | Request diagnosis; do not buy an internal part by symptom alone. |
See the parts compatibility register for its model and revision caveats, and use Breville’s BES870 support hub for the current manual, parts and service channels. “First check,” “Likely” and “Possible” describe the order of investigation, not measured probabilities.
FAQ
Is water in the Barista Express drip tray a leak?
Not always. Breville says the machine purges water into the tray after espresso, hot water and steam. An overflowing tray or water outside it still needs investigation.
Why does water escape over the portafilter?
First confirm correct seating and remove grounds from the accessible rim when cool. A worn silicone group-head seal is one manufacturer-documented possibility if the problem persists. A photograph of the first wet point helps distinguish this from water spilling later from a cup or tray.
Can I replace the group seal myself?
The BES870 manual contains a user-facing procedure using the Allen key. Follow the edition for your exact model and region, power off and unplug first, and stop if a fastener or part does not move as described. If water is coming from the base instead, replacing the group seal is not a supported diagnosis.
Further reading: return to Barista Express model guides, compare low-pressure symptoms, or use the diagnostic wizard to choose the next safe check. See how we diagnose and our source policy. Technical source checked 27 September 2026: Breville BES870 USCM instruction book, Care & Cleaning and Troubleshooting. Availability and instructions can vary by revision and market.